What an Amazing Instructor
What an amazing instructor, I\’ve purchased many of her series. The quality and relevancy of topics can apply to any developer at any skill level. There\’s something for everyone.
What an amazing instructor, I\’ve purchased many of her series. The quality and relevancy of topics can apply to any developer at any skill level. There\’s something for everyone.
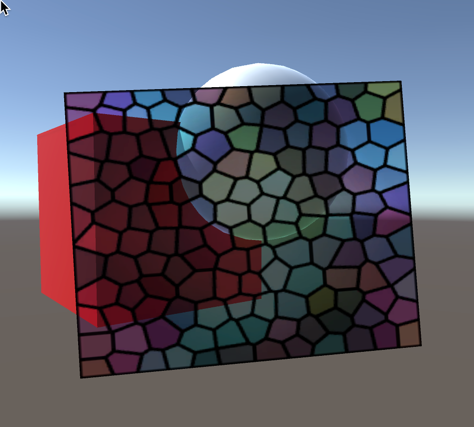
The job of a glass shader is to make the object appear transparent, though sometimes you might want to distort the image that appears on it. This means it’s not simply a matter of making something transparent but getting the scene behind the glass onto the glass plane (or whatever glass object you have). That requires us to take a screen grab and place the pixels of that screen grab on the plane.
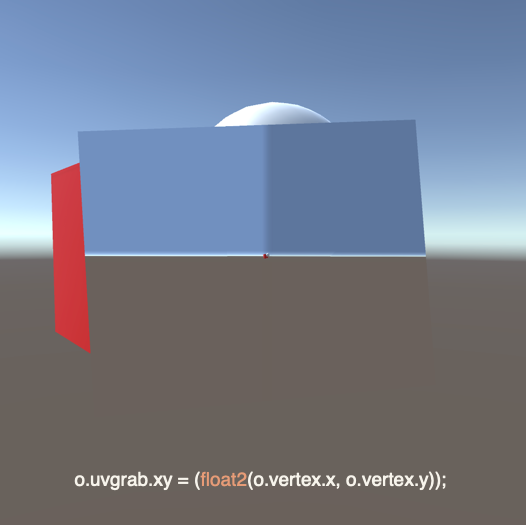
This image represents the first step in getting a grab of the pixels on the screen behind the glass and putting them onto the surface of the glass. So each pixel of the entire scene (minus the glass) is basically put into the exact same UV position on the plane. You can see the effect this has had. The larger screen grab of the entire window is placed onto the plane and thus results in the screen appearing smaller. It looks like the scene has been scaled right down or that the objects in the scene have become further away. Why?
o.vertex is in world space whereas o.uvgrab is in the screen space. For the vertex the z value stores the depth information and the w stores the forth value in a homogeneous vector. When w is 1 the vector is normalised (e.g. has a length of 1) if w is any other value then it is the scale of the vector.
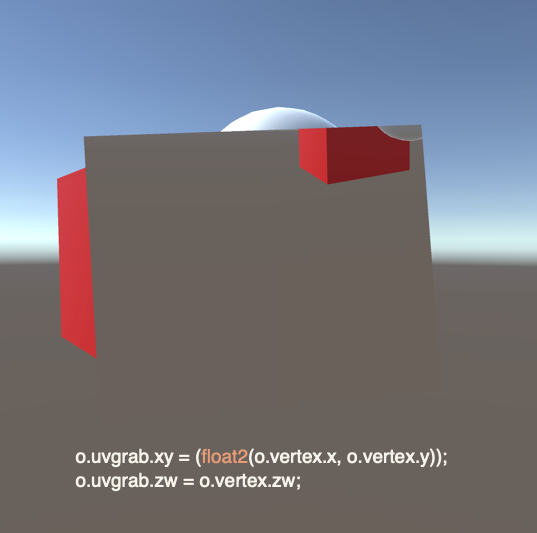
If you set the uvgrab.zw to o.vertex.zw you’ll get a better looking screen grab on the plane but it will be offset due to the grab and vertex zw values being used for different reasons.
Why is this? Well the clip space isn’t the final value that gets used the clip space is then converted to normalised device coordinates (NDC) which are found by dividing each of the (x, y, z, 1) values in clip space with w to get them into a NDC (x/w, y/w, z/w, 1).
The NDC z value is a depth coordinate but goes from 0 on the near plane to 1 on the far plane with Direct3D, Metal and gaming consoles and in OpenGL the value rates from -1 on the near plane to +1 on the far plane.
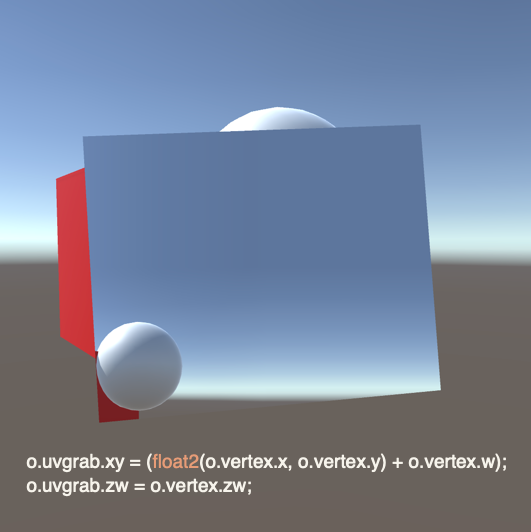
By adding o.vertex.w to the x and y vertex values you are essentially moving value in the uvgrab over by the scaled value if there is one. This essentially moves the entire grab over by at the most 1 UV which is the entire image width and height.
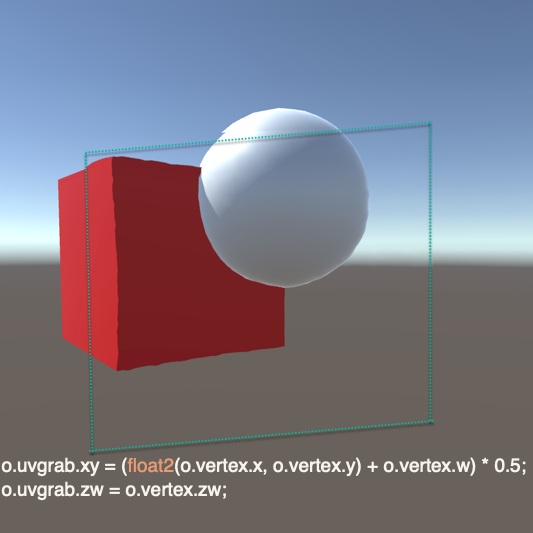
So then multiplying the resulting x and y by 0.5 will move them across by half re-centering the pixels on the glass plane.
In all, what you’ve achieved is correctly positioning the UVs for a screen grab of the pixels directly behind the plane, onto the plane using the plane’s depth in the scene thanks to the z and w values. But you’ve had to make adjustments to the x and y values because when you go from clip to NDC everything gets scaled again automatically in the background for you.
For more information check out:
Welcome to WordPress. This is your first post. Edit or delete it, then start writing!

Sed sagittis, elit egestas rutrum vehicula, neque dolor fringilla lacus, ut rhoncus turpis augue vitae libero. Nam risus velit, rhoncus eget consectetur id, posuere at ligula. Vivamus imperdiet diam ac tortor tempus posuere. Curabitur at arcu id turpis posuere bibendum. Sed commodo mauris eget diam pretium cursus. In sagittis feugiat mauris, in ultrices mauris lacinia eu. Fusce augue velit, vulputate elementum semper congue, by Themify.
It does not matter how slowly you go as long as you do not stop.

Pellentesque vitae purus eros, ut dapibus sem. Fusce in ipsum at augue cursus consectetur. Curabitur lacinia, lorem eget gravida volutpat, magna nunc dapibus purus, et fringilla ipsum ante in eros.
Duis dui risus, scelerisque in elementum in, consequat sed ipsum.